AD
AEScripts Lockdown v1.6.1 for After Effects Full Version for Windows Macintosh Free Download
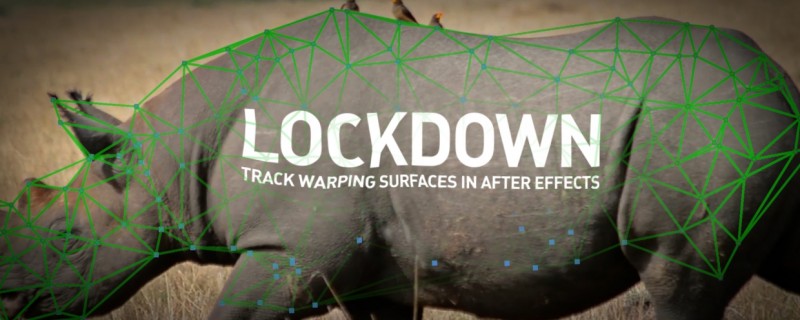
Now with an insanely accurate tracker! Lockdown is a revolutionary new plug-in that allows you to track warping surfaces inside After Effects. Perfect for beauty retouching and other previously difficult cleanup jobs!
Please note that 500 Externalized Points are no longer supported in Lockdown 1.61. We only allow 4 because we recently discovered 500 would effect click and drag responsiveness. If you have 1.3 installed, please internalize all points for all Lockdown instances, then save your project before installing Lockdown 1.6.1.
Lockdown is a revolutionary new plug-in that allows you to track warping surfaces inside After Effects. Perfect for beauty retouching and other previously difficult cleanup jobs!
Controls
To use the Plug-in, please follow the instructions labeled 1-8.
1) Pre-Compose
The layer that Lockdown is applied to, and the Composition that layer is in, must have the same resolution and framerate for Lockdown to work. This button is optional, but it’s recommended that you use it to pre-compose your layer into a composition that matches the layer’s resolution and framerate, and work inside that pre-comp.
2) Optional Tracking Filter
This optional button applies effects that sometimes allow our tracker and Mocha to better identify textures. It’s probably not necessary when using Vector Tracking. It’s basically an edge detect with a lot of contrast. You should be in 16 or 32-bit mode when using this filter. Running a denoiser on the original footage, and again on the final result also improves trackability. This is great for a shot where lighting is changing, because it brings out details in cracks and surfaces, and tends to ignore larger gradients. You’ll want to delete these effects once tracking is done, after Step 5.
3) Generate Points
You can create points individually, or within a lasso region. Please note the After Effects UI MUST BE ON to do this or any other interaction with Lockdown. If you can’t see your masks, anchor points, bezier handles, etc… Your After Effects Effect UI is off. Turn it back on.
Lasso Grid Pixel Distance: This is how far apart the points of the lasso grid are. It’s generally recommended to use the largest number you can, therefor having the smallest amount of points.
UI Toggle: Control/Apple+Shift+H
Create Point: Control/Apple + Click
Create a lasso region of points: Control/Apple Click and drag around an area.
Delete single point: Option/alt+Click
Delete within a lasso region: Option/alt+Click and drag around the points.
Select multiple points: Click and drag around them
or shift-click to add to selection.
Add extension points: Ctrl/CMD+shift+option/alt+click
Click ‘nothing’ to de-select
Please note that you can only draw points on one frame at a time. If you draw points on frame 1, then go to frame 20, and create a new point, all frames will be re-located to frame 20. (This was not an intentional design choice, we hope to someday change this.)
Mocha/Face Tracker Import
This button will search the layer Lockdown is on. If it finds exposed Mocha points, or Face Tracker effect points, it will import them into Lockdown as externalized points. It is at the top of the Plug-in.
4) Track Points
Point Track Method: Three options for tracking points.
Accurate: This does well on most shots, with average accuracy and speed.
Fast: This mode is very fast, but only works on the simplest of shots. It is going to be depricated, we’d recommend not using it.
Connected Vectors: This is by far the most accurate method for tracking points, and we highly recommend using it every time. You will be required to render an EXR pass with your footage, which contains tracking vectors. There are three modes. Extremely Accurate is very slow to render the EXR pass, but easily the best. Accurate provides some middle ground, however we would recommend using “Extremely Accurate”. Fast mode is very very fast, and is useful on simple shots. After the EXR pass is generated, tracking the points will be VERY fast because it’s merely pushing points along the vectors, not actually doing any heavy tracking.
Full Vector Setup: This script will duplicate your layer, and apply the “Generate Vectors Plugin” to it, with the Vector Tracking Method above. It will set these motion vectors to render, and after the render, is set to replace the very slow rendering composition with a very fast reading EXR pass. You must interpret the EXR pass to “Preserve RGB”, or it will not work.
Press to Track Points
This takes all the points in the step above and attempts to track them to the footage. You MUST keep the Lockdown Effect selected while tracking, with After Effects up and activated. Sorry for the inconvenience, again, this was not an intentional design choice, but a limitation of our first version.
After your first round of tracking, we’d recommend watching your footage very closely. You may need to add more tracks. When a track is not visible, that means it has no keyframes on that frame. You may choose to go back to step 3 and add more tracking points, then press this button again to add these new points to the track. To edit tracks manually, please check out the sections on “Internalize Selected Points” and “Externalize Selected Points”.
4.1) Delete backward keyframes
For the selected keyframes, delete all keyframes earlier in time. Useful for quickly cleaning tracks.
4.2) Delete forward keyframes
For the selected keyframes, delete all keyframes later in time.
5) Interpolate Partial Tracks
This button is necessary 99% of the time. Let’s say you have a shot that’s 100 frames long. You have a handful of tracks at the beginning that all die off (contain no keyframe data) after the first 60 frames, so the range is 1-60. You also have tracked points from the end of the shot, that are from the range 40-100. Your two sets of tracks overlap between frames 40-60. By pressing this button, at the time at which any tracks are “dead” and having no keyframes, they will find “living” tracks around them and follow their motions. So even if a track does not live for the entire length of the shot, it can follow your surface VERY accurately by piggybacking on the tracks later in the shot. This solves the problem of tracks just sitting entirely still when they die, and causing parts of your mesh to freeze. The motion from interpolation is represented by keyframes, so in the previous example, all of your keyframe tracks would now show keyframes from the range 1-100, rather than their previous ranges. This interpolation can be toggled on and off, deleting the “interpolated” keyframes as many times as you’d like. The only limitation to be aware of is this works best with “internalized” keyframes. If you’re using this option with “externalized” keyframes, you run the risk of the interpolation being baked into the keyframe tracks permanently. It’s recommended that all tracks are always internalized when using this option. If you find yourself deleting bad points, or adding new points, you should toggle this option off to delete the previous set of interpolated keys, and then on again to re-generate new interpolation based on your hand cleaned tracks.
6) Generating a mesh and “Auto Triangulate Mesh”
Create Mesh Edge: To manually connect two TRACKED points, select one, then Control/Command + Shift + click another point.
Lockdown can only render quads and triangles. Green lines represent the borders of Quads and Triangles, white lines represent lines that are part of incomplete geometry and not contributing to the mesh. There is no concept of “faces” in Lockdown with which the user can interact. Faces are determined by edge connections.
Delete edge: Option/Alt+Click
Auto Triangulate Mesh: Press the button. Please note that quads often render smoother than triangles. Manually drawing a mesh into quads can often provide better results. One easy way to compensate for this, however, is to have MANY dense tracking points, in which triangles will look great.
7) Apply Mesh on this frame
This button takes the current frame and determines that this is the hero frame you wish to draw on. Lockdown now stabilizes the entire video to this frame. This can be undone and re-done over and over and over again without consequence by pressing this button. It’s recommended to “Apply Mesh” on a frame in which your tracked object is largest, or flattest towards the camera so it’s easiest to paint on.
At this point you should watch your stabilized composition very carefully. If you see any areas sliding, that means you didn’t put enough tracking markers on them. You can press “Apply Mesh” again to clear your stabilization. Create some new tracking points, re-toggle “interpolate partial tracks”, then connect these new points to your mesh as described in step 6. When you press “Apply Mesh” again, you will be back to where you just were, but now with new tracking points contributing to stabilization. One last thing to keep in mind, when the mesh is “applied” it only stabilizes within the bounds of the existing trackers. so for example, if you only put tracking markers on a persons face in your shot, when you “apply” the mesh, only the face will be visible, and the body and other areas without geometry on them will be Alpha-0 transparent.
8) Lockdown!
Pressing this button will pre-compose this layer for you, with the stabilized video inside. It will also create a freeze-frame guide layer of the frame chosen from Step 7, so it’s easy to remember which frame was your hero frame, the frame that you should be painting on. It also creates a background for your main comp, which your stabilized/tracked composition sits on. It essentially automatically completes your compositing setup with compositions and layers in After Effects.
When this process is complete, you’ll see no indicator in the render that anything is tracking. You have to go into the stabilized comp, and put in some text. Then you can tab back out, and see how well your text tracks.
Please note that the Lockdown process can take anywhere from a few seconds, to a few minutes, depending on how heavy the shot is. Don’t touch anything while it’s working. The bottleneck that causes the delay is the copying and pasting of the dense keyframe tracking data. We apologize for this inconvenience, just know that the software hasn’t crashed if you get the spinning beachball of death or hourglass.
Untracked point:
These only exists on a single frame. These can be created by ctrl/cmd + clicking, or with a click and drag as described above.
Tracked Point:
These are keyframed tracks that follow along with your footage.
Mesh Vertex:
Once a tracked point has been successfully connected with 2 or 3 other tracked points, it will form a geometric face, as part of the Lockdown mesh. Green indicates it’s part of a mesh.
Mesh Edge:
An edge (connection between vertices) that is part of a completed polygon, therefore part of the Lockdown mesh.
Non-Mesh Edge:
A connection between two tracked points. The white color indicates it is not part of a completed polygon.
Selected Edge:
An edge (Either type) that the user has selected.
Selected Untracked Point:
An untracked point the user has selected.
Selected Point/Vertex:
A tracked point or vertex can be selected and externalized, internalized, or deleted.
Rendered Tracked Point:
This just shows where your tracked points are, but rendered directly into the footage for smoother playback. The UI of Lockdown and all Plug-ins typically will not play in real-time.
| After Effects | CC 2020, CC 2019 |
|---|
AEScripts Lockdown v1.6.1 for After Effects Full Version for Windows Macintosh Free Download
[button-red url=”https://www69.zippyshare.com/v/3gsAG6cK/file.html” target=”_blank” position=”center”]Download from Zippyshare [61 MB][/button-red]
Please read FAQ & FIX GDRIVE if you need basic help.
Those who sell pirated content are losers.
If you're paying for pirated content, you're the biggest loser.
Please read the FAQ if you need basic help.
Use VPN &
FDM if you have download problems.
AD
